Uvily Light
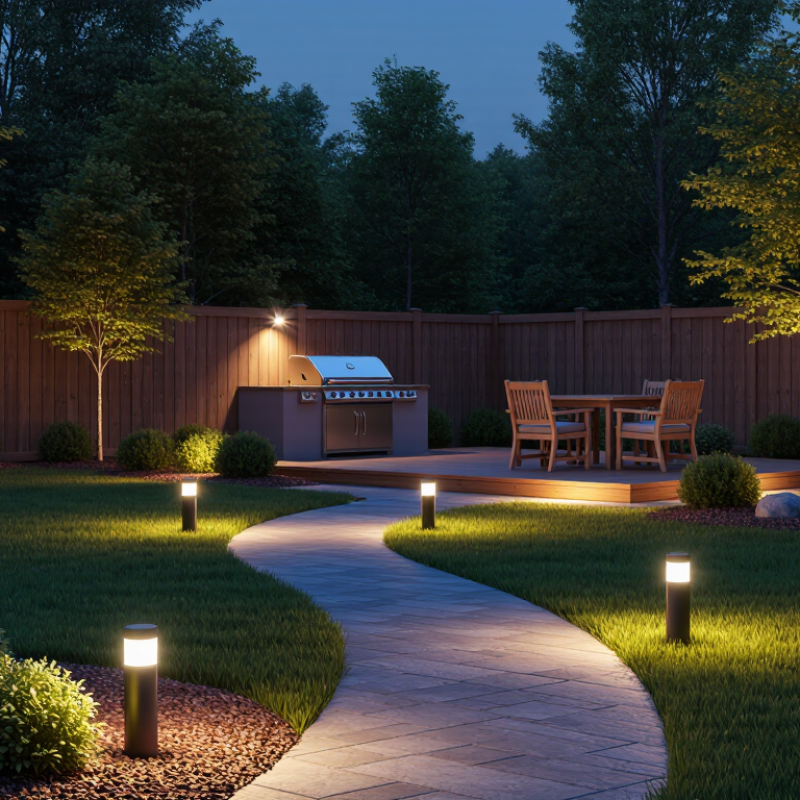
Backyard lighting is not simply about adding brighter fixtures. It is about placing useful light where people walk, sit, cook, and relax. The wrong lumen level can create harsh glare near a patio, while leaving steps and planting borders poorly visible. That imbalance is easy to notice at night. It is also easy to underestimate during daytime planning.
The U.S. Department of Energy reports that LED lighting can use at least 75% less energy and last up to 25 times longer than incandescent lighting. However, efficiency does not make excessive brightness acceptable. The Illuminating Engineering Society distinguishes lumens, which measure light output, from illuminance, which describes light reaching a surface. This difference matters when selecting path lights, wall fixtures, or low-voltage landscape lamps. DarkSky’s outdoor lighting guidance also supports useful, targeted, and controlled illumination, rather than flooding an entire yard.
So, how to choose the right lumens for backyard lighting? Start with the task, fixture height, beam spread, surface color, and surrounding darkness. A small path may need modest output, while a grill station requires clearer task lighting. Warm light around 2,700–3,000K often feels more comfortable in residential spaces. Yet lumen labels can mislead when optics vary. A 500-lumen spotlight and a 500-lumen lantern will not look identical.
There is no perfect number.
A careful design uses fewer fixtures, aims them precisely, and tests the space after sunset. My practical view is imperfect but useful: install one sample light first. Walk the path. Sit beneath the fixture. If your eyes keep searching for relief, the backyard is probably too bright.
What Lumens Mean in Backyard Lighting
Lumens measure the total visible light produced by a lamp. Watts measure energy use, not brightness. The U.S. Department of Energy explains this distinction in its lighting guidance. That difference matters outdoors, where dark surfaces can absorb light and pale walls can reflect it. A 500-lumen fixture may feel soft beside a brick path, yet harsh near a white patio wall. There is no perfect number.
For orientation, a small step light often works around 50–150 lumens. Pathway fixtures commonly need about 100–300 lumens each. Wider areas may require 700 lumens or more, depending on mounting height and beam spread. These figures are practical starting points, not strict rules. The Illuminating Engineering Society emphasizes evaluating illuminance, glare, spacing, and visual comfort together. My first backyard layout used too many bright fixtures. The patio looked secure, but the garden lost its depth.
Tips: Sketch the space at night. Mark steps, seating, planting edges, and dark corners. Start with fewer lumens, then add light after testing. Use warm color temperatures for seating areas, and shielded fixtures near eye level. The U.S. Department of Energy reports that LED lighting can use at least 75% less energy than incandescent lighting, but efficiency cannot fix poor placement. Check the actual beam, shadows, and reflections before final installation. A lumen label helps. It does not replace observation.
Choosing the right lumens starts with the outdoor area, not the fixture itself. Lumens measure visible light, while brightness also depends on placement, beam angle, and surface color. A pale wall reflects more light than dark wood. I learned this after making a small patio feel harsh with only a few powerful fixtures.
For garden paths, aim for about 100–200 lumens per light. Space them evenly, and avoid creating bright spots beside deep shadows. Steps usually need 12–100 lumens per step light, depending on their width and surrounding darkness. Entry doors benefit from roughly 200–400 lumens, especially when visitors must identify keys or house numbers. Keep the light near eye level or below it. Glare becomes uncomfortable quickly.
Patios often work well with 300–600 lumens per fixture, divided across several locations. Use softer light near seating, then add stronger illumination near grills or food-preparation areas. Driveways and larger yards may need 700–1,300 lumens from carefully aimed floodlights. Aim them downward, not toward windows or neighboring homes. Too much light can reduce visibility by shrinking the eye’s natural adjustment to darkness. I still find lumen estimates imperfect because tree growth, weather, and fixture aging change the result. Test one area at night before installing everything. A dimmer setup may feel safer and more welcoming.
Lumens measure visible brightness, while watts measure energy use. That difference matters when planning a backyard. A small path light may need only 100 to 200 lumens for clear footing. Steps often need more, especially near uneven edges or dark corners. In my own yard, I once used overly bright lights beside a narrow walkway. The glare made shadows deeper and made the path feel less secure. I should have tested one fixture at night before installing several.
Comfort and atmosphere need careful adjustment. Around a seating area, 300 to 800 lumens may create usable visibility, depending on the space and fixture position. Warmer light can make wood furniture and plants appear calmer, while excessive brightness can flatten the evening mood. Start lower. Small changes matter. After installation, sit in the yard for ten minutes and notice glare, dark patches, and reflections on windows. I still find that one dim corner can be useful; removing every shadow sometimes makes a backyard feel artificial.
Why Choosing the Right Lumens Matters for Backyard Lighting?
Lumens describe total light output, but they do not show where that light goes. Beam angle changes the result dramatically. A narrow beam can highlight one tree with modest lumens, while a wide beam spreads softly across a patio. In practical tests, I have seen a bright narrow spotlight create harsh shadows beside a dim seating area. More brightness was not the real solution.
Match the beam angle to the task. Use narrower beams for trunks, sculptures, and tall planting. Choose wider beams for steps, paths, and dining spaces. Overlapping wide beams can reduce dark gaps, but excessive overlap may cause glare. Measure the viewing distance before selecting fixtures. A light meter can help, although household surfaces reflect light differently.
Light color also affects perceived brightness. Cooler white light can appear sharper and brighter, while warmer light usually feels calmer around wood, stone, and foliage. For most backyards, a warm-to-neutral color range supports visibility without making the garden look clinical. I once chose a cooler setting for clearer steps, then noticed it flattened the plants’ natural colors. That choice needed reconsidering. Brightness, coverage, and color must work together. A lower-lumen fixture with the right beam and color can feel more effective than a powerful light aimed poorly. Consider the neighbor’s window, too. A beautiful beam becomes a problem when it enters someone else’s room.
How to balance lumens with beam angle and light color for comfortable, useful outdoor illumination.
Lower outputs suit pathways and steps, while patios and entrances generally need more total light.
Narrow beams concentrate light on trees or architectural details; wider beams spread light across seating and walking areas.
Warm white light around 2700K–3000K is commonly preferred for residential outdoor spaces because it feels inviting and reduces glare.
The values show practical starting points per fixture. Actual requirements vary with mounting height, surface reflectance, spacing, surrounding darkness, and local safety needs.
Efficient backyard lighting starts with the task, not the brightest bulb. Plan each zone before choosing its lumen output.
A pathway often works well with 100–200 lumens per fixture.
Seating areas may need 300–600 total lumens for comfortable conversation.
A larger tree or wall may require more, especially with dark surfaces. Avoid treating these numbers as fixed rules. Less can be more.
Walk through the yard after sunset and note where shadows feel unsafe or uncomfortable. I once placed powerful lights near a patio, but their glare made faces difficult to see. The setting looked bright, yet it felt poorly designed.
Now I choose lower lumens first and add dimming where possible. Space fixtures evenly, aim them downward, and keep light away from neighboring windows. Pale walls and paving reflect more light, so they may need fewer lumens. Dense plants absorb light and can require careful repositioning. Check the fixture’s actual lumen rating, not its wattage, and consider how weather or dirty covers may reduce brightness. A small test installation can reveal mistakes before the whole plan is finished.
Aim for about 100–200 lumens per path light. Space fixtures evenly to prevent bright spots and deep shadows.
Step lights often need 12–100 lumens per step. Wider steps and darker surroundings may require more output.
Use roughly 200–400 lumens near the door. Keep the light near eye level or lower to reduce glare.
Patios often need 300–600 lumens per fixture. Spread the fixtures around seating, cooking, and walking areas.
Carefully aimed floodlights may need 700–1,300 lumens. Aim downward, away from windows and nearby homes.
No. Balanced brightness usually works better than maximum brightness. Excessive light can deepen shadows and strain the eyes.
Narrow beams highlight trees or tall plants. Wide beams suit paths, steps, patios, and dining spaces.
Warm-to-neutral light usually suits wood, stone, and foliage. Cooler light can look sharper, but it may flatten plant colors.
Install one fixture and test the area at night. Sit nearby for ten minutes and check glare, dark patches, and window reflections.
Yes. Tree growth, weather, surface color, and fixture aging change the result. My estimate may still be wrong.
Choosing the right lumens is essential for creating a backyard that is safe, comfortable, and visually appealing. Lumens measure the total amount of visible light produced by a fixture, so the ideal level depends on the outdoor area and its purpose. Pathways and steps usually need modest brightness for guidance, while patios, dining areas, entrances, and task spaces may require more illumination. Learning how to choose the right lumens for backyard lighting helps prevent spaces from feeling either dim and unsafe or harsh and uncomfortable.
Brightness should also be balanced with beam angle and light color. A wide beam can spread light across larger areas, while a narrow beam is useful for highlighting specific features. Warm light often creates a relaxed atmosphere, whereas cooler light can improve visibility in functional areas. By selecting efficient fixtures, avoiding unnecessary over-lighting, and matching lumen output to each zone, homeowners can build a practical lighting plan that enhances the backyard while reducing energy use and glare.
